Dashboard #
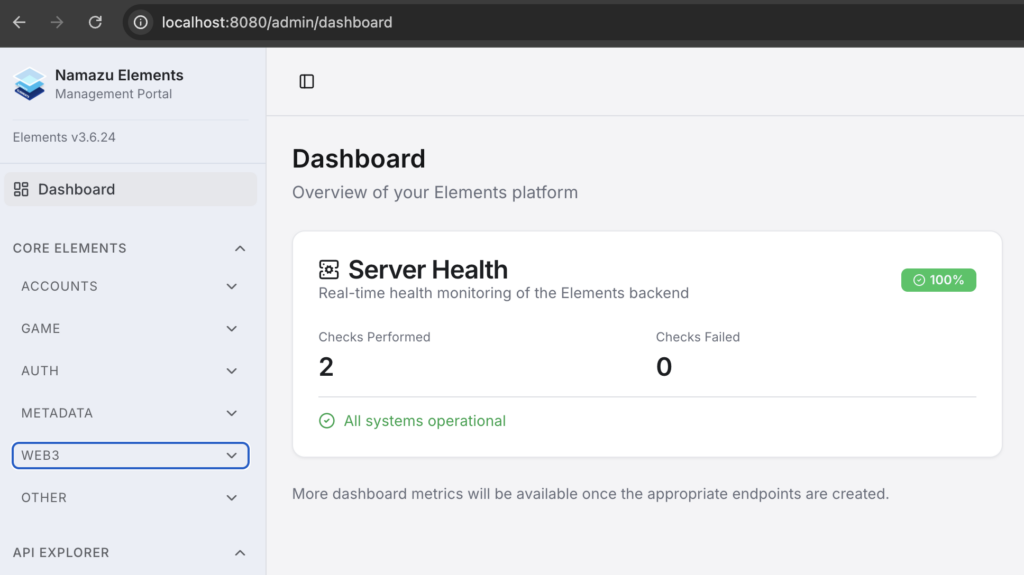
The dashboard is where you land right after logging in. It currently displays the results of the health check endpoint. This will also eventually be where analytics info lives.
Core Elements #
The Core Elements features are split into several categories, each with several pages. Each page will show a list view that allows your to view, modify, create, and delete objects related to that page.
When creating a new object, you can navigate away from that window if need be, and it will save the draft in progress. This can be useful when you need to create a dependency of the object that you’re working on. For example, you are defining a new Mission, but forgot to make the Item that represents the reward.
There is also a Refresh button near the top of each page. For speed purposes, we cache the query results locally. However, in a live product, things can be constantly changing. If you need to force the page to fetch the latest results, you can do this via the Refresh button.
Each page is also paginated, and often only fetches a subset of the whole. This helps to ensure that you don’t lock up the system when querying larger data sets. See Settings for help on changing the number of results that you see per page.
Accounts #
The accounts section is where the user account and application information are managed.
Users #
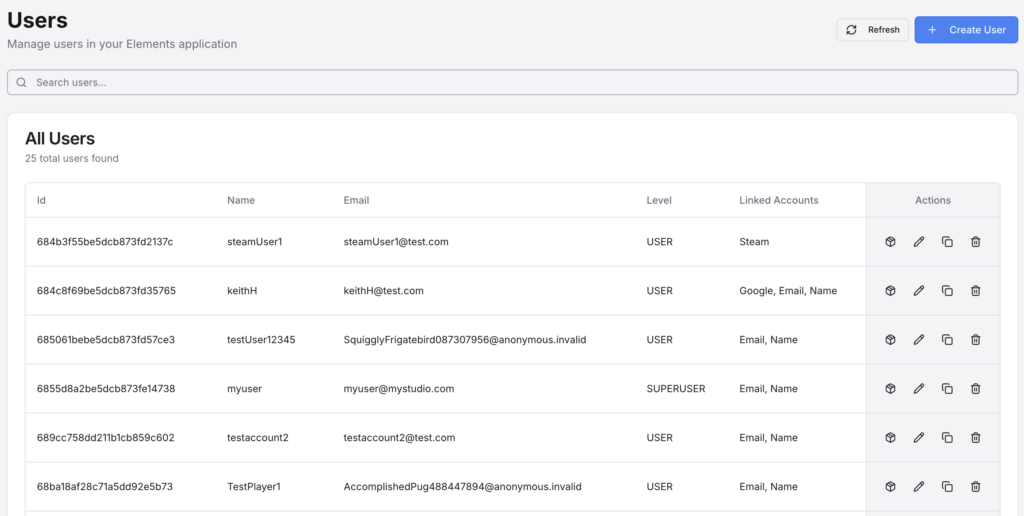
Here, you can access the User management tools which will be useful for support operations such as manual password reset, inventory management, information correction, and more.
The search bar will search for all Name and Email fields that contain the search string. For example, searching for “bag” would return users named “bagel” and “baguette@bread.com”, but not “badminton”.
When using a username + password to sign in, a name or email is required by the system. When using another method such as OIDC or OAuth2, Elements will link your user to the external account. These accounts are all listed under Linked Accounts. See What is a User? for more information on how Users are structured.
The available actions are, from left to right: View Inventory, Edit User, Copy User, Delete User
Applications #
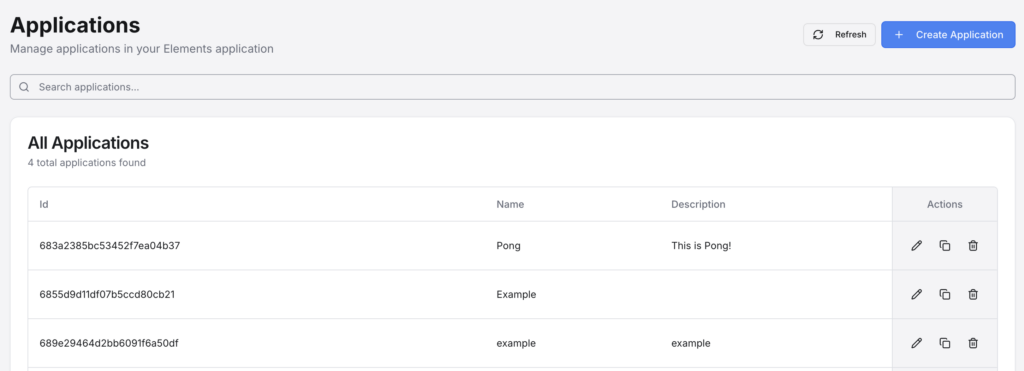
The Applications page allows for you to create new and manage existing Applications. Creating an Application is a required first step for a variety of other actions, such as creating Profiles, and adding custom code to/extending Elements’ functionality. See here for more information on Applications.
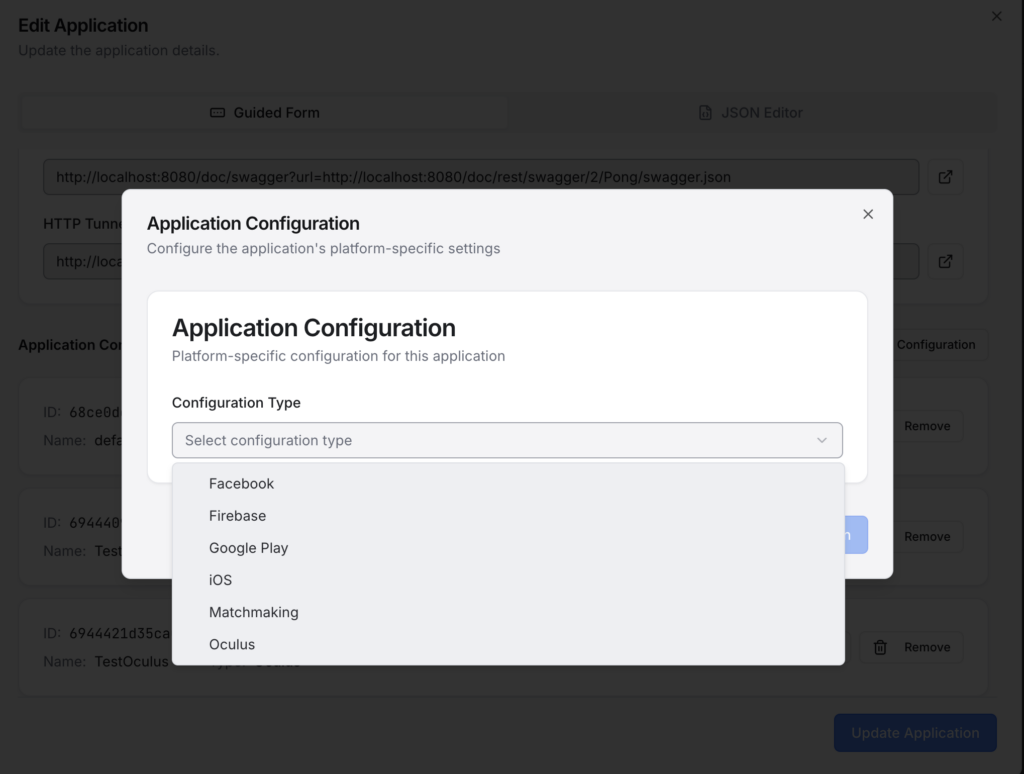
Applications also have what are called Application Configurations to help you tie your Application to other services. This can include various things, such as:
- IAP platforms (such as Google Play and Apple) and how you map your IAP SKU to digital goods in Elements.
- Firebase configuration for push notifications
- Matchmaking configuration for use with the Matchmaking API or Namazu Crossfire
Profiles #
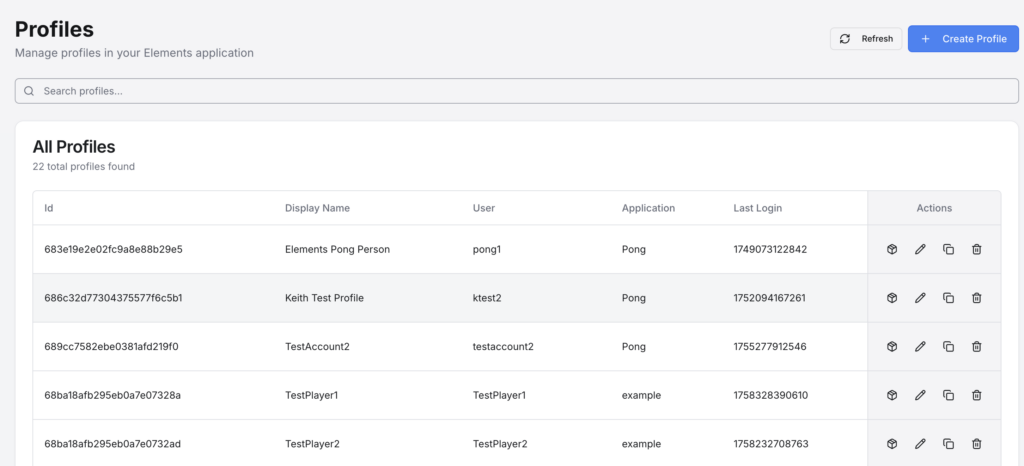
Profiles are the Application specific info for a User. If you think of a User as the overarching account, then a Profile would be your character info for a game. See What is a User? for more information on how Profiles relate to Users.
The available actions are, from left to right: View Inventory, Edit Profile, Copy Profile, Delete Profile
Receipts #
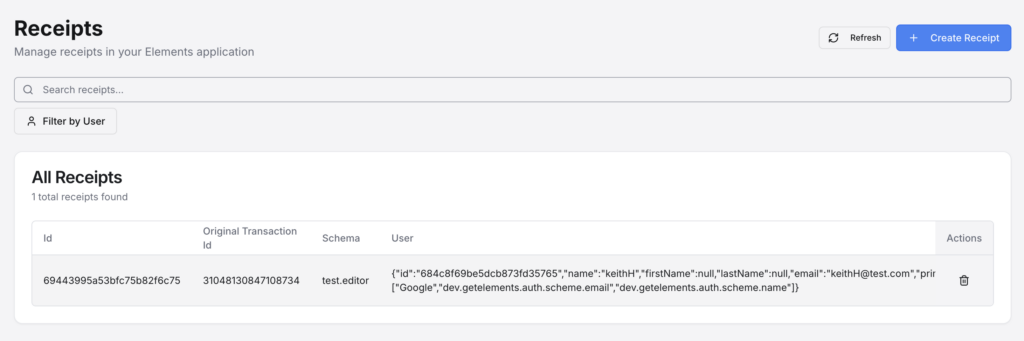
This shows you the raw receipt data. Since receipts can come from a variety of sources and can be formatted differently based on that source, we store the receipt’s raw data attached to our generic Receipt model. This is mainly used to verify purchases that the user made and help resolve any issues they may have had in redeeming an item, or restoring a purchase. Search will look through either the Original Transaction Id or the Schema.
Game #
This section contains pages more directly related to the game itself.
Items #
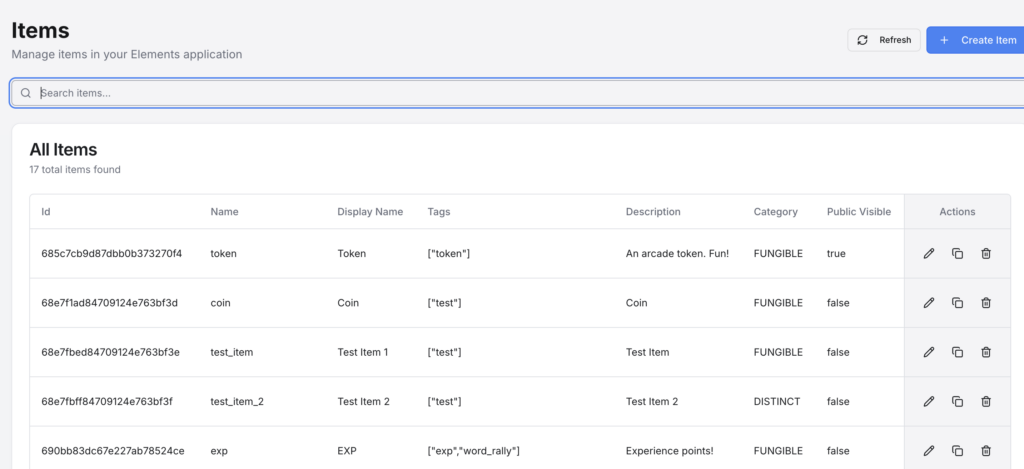
The Items page is where all of the Item definitions are located. It is necessary to define an Item before you can set it as a reward for missions or add it to a User’s inventory. See Digital Goods for more information.
Missions #
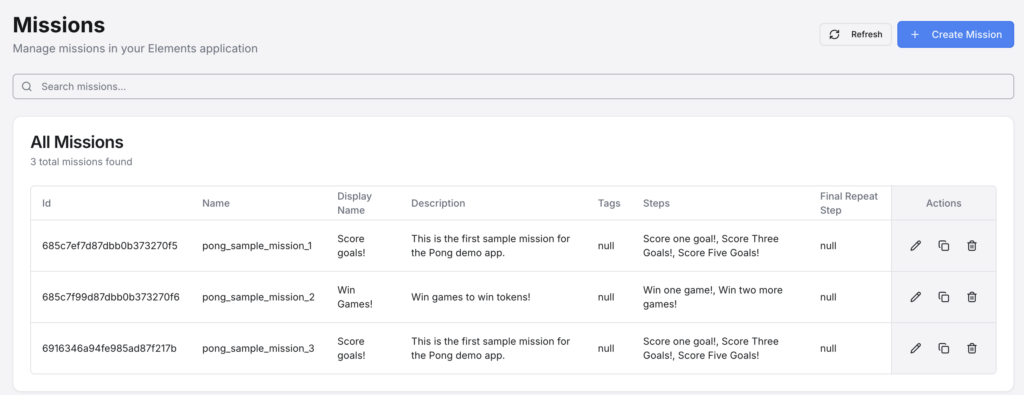
This is where you can define all of the information for a Mission in your game. Missions can get pretty detailed, allowing you to define multiple steps and rewards for each step along the way. A Final Repeat Step can also be assigned in the event that you want it to be repeatable by the user. Once a Mission is started by the User, it becomes a Progress object, which tracks the User’s current Step. See Missions and Progress for more information.
Schedules #
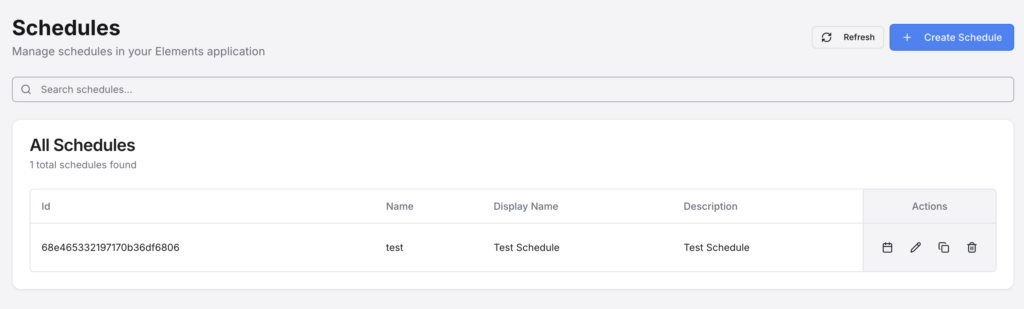
Schedules are ways to create timed or recurring events. Some games have special seasonal, monthly, weekly, and even daily missions to help incentivize users to return and re-engage with their game. Schedules are assigned to a User’s Progress when they start a Mission.
Leaderboards #

The Leaderboard section allows for you to create and modify Leaderboards. See here for more information on how to define a Leaderboard.
Matchmaking #
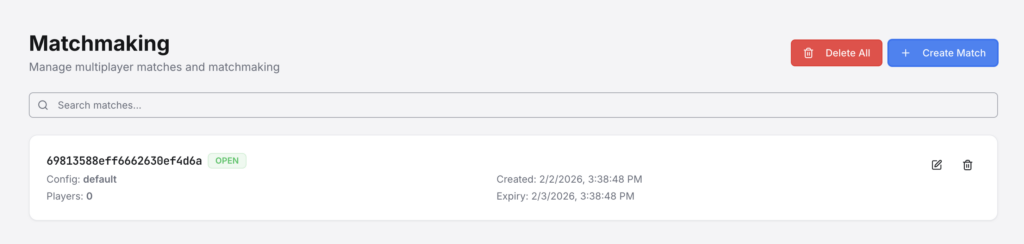
The Matchmaking section allows for you to see all current matches. You can also manually create matches, as well as delete one, or all matches. This can be useful for quick iterations when debugging your game, as well as player support operations.
Auth #
This section allows you to define and edit various types of auth schemes to provide different ways to allow your users to log in and link accounts. See here for an overview on Auth Schemes.
OIDC #

Open ID Connect, or OIDC, is an authentication flow used by many auth providers, such as Google, Apple, Meta, and more. Elements will configure several defaults for you, but you can add or modify others as you like. Be sure to follow the documentation for the provider that you’re adding. See here for more information on OIDC Auth Schemes.
OAuth2 #

OAuth2 is the overarching methodoloy behind OIDC. While OIDC is a specific implementation, OAuth2 can be implemented in a variety of ways, and typically requires a server to server call. The OAuth2 Auth Schemes in Elements similarly have a lot of configuration options to be compatible with the requirements of different providers, such as Steam or Oculus. See here for more information on OAuth2 Auth Schemes.
Custom #
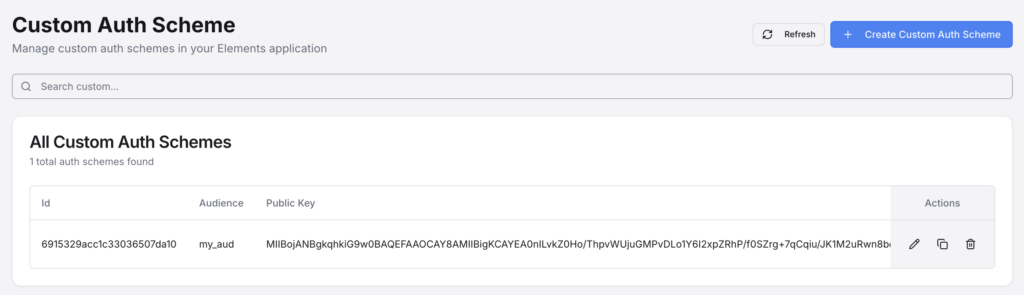
Custom Auth Schemes can be defined as well for use with any custom auth flows that you might want to author. This will generate a public/private key pair with encryption options and other metadata that you can configure.
Metadata #
Metadata #

This page allows for you to define global Metadata objects. These Metadata objects can be as simple or complex as you want, from a simple version number to a full configuration. An access level can also be defined if you don’t want your average user to be able to access specific information, for example a configuration that is only meant to be accessed via your custom Element code.
Metadata Spec #
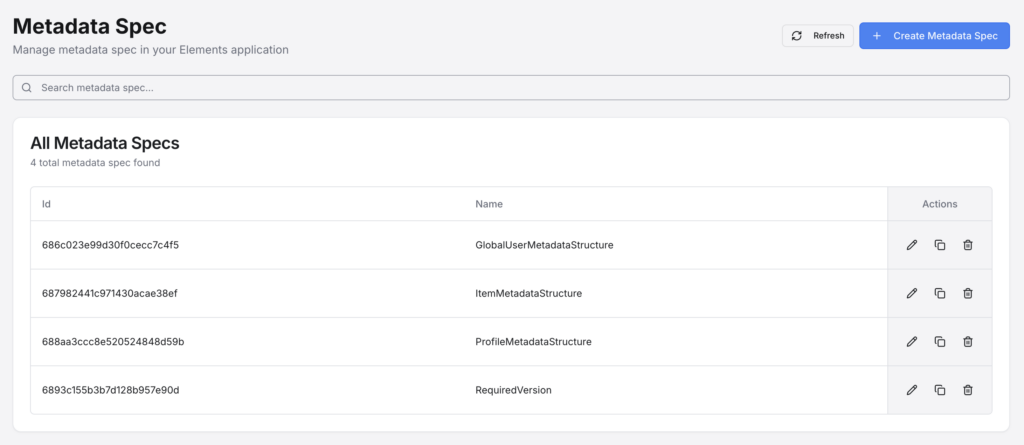
This page allows for you to create and manage Metadata Specs. These allow you to define the structure that a Metadata object or a metadata field on another object (such as Items or Profiles). This can be very powerful as it lets you predefine how Metadata should be handled and what the various field names can be on different objects, which effectively allows for you to extend the functionality of existing object types within Elements. See Metadata for more information.
Web3 #
If you want to connect to a chain or specific contract and maintain a custodial system for your users, this is where you can define the smart contract info. Elements also has a system to secure user information (wallet/account info) in what are called Vaults.
Smart Contracts #

Here you can define contracts and set their address for reference in your custom code. Once defined, you can call into the contracts directly from your custom backend code to perform actions on behalf of the user. It is also possible to define a master wallet which can sponsor transaction fees on behalf of the user as well. See here for more information on Smart Contracts.
Vaults #

Here you can view and manage user wallets for different networks, all under one vault for that user. See here for more information on Wallets.
Other #
Large Object #
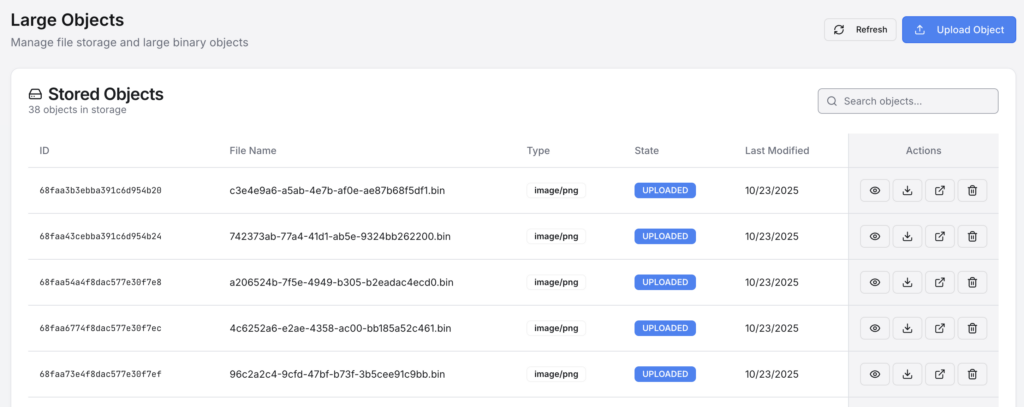
Here is where you can upload and store arbitrary data. Depending on the type of data, you can also preview the image. This is useful for live ops, A/B testing, and other actions where you might want to store files and other game assets in Elements directly.
API Explorer #
Core API #
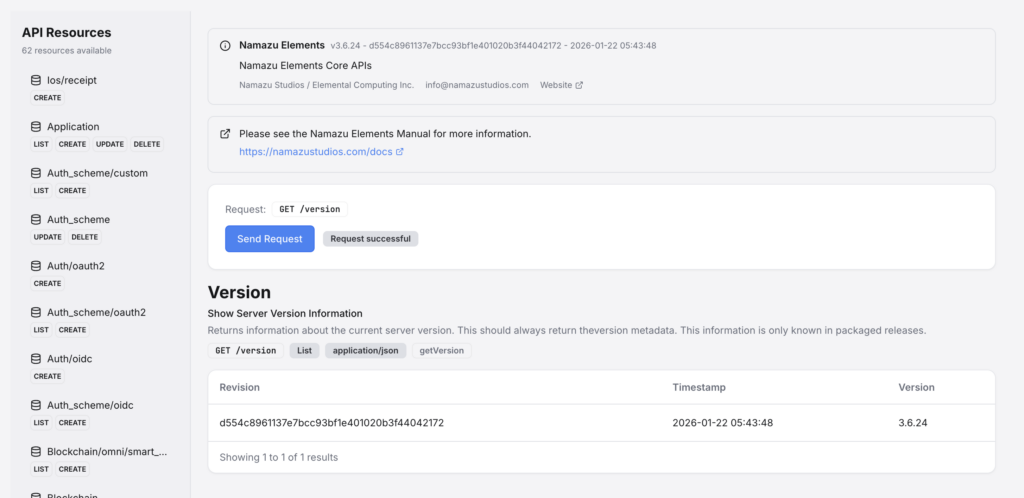
The Core API section allows you to look at the entirety of the Elements API and test out endpoints. It downloads a generated Open API Specification 3 (OAS3) file and creates UI dynamically. This can be useful for quick testing or reference. For most requests, it will use the session token that allows you to access the CMS. This can be overridden for some requests if you want to test endpoints as a different User.
Core Elements #

The Core Elements section gives you information on the various exposed features in the Core Elements platform, which is useful when writing your own custom Element. This includes all DAO (Data Access Object) level, service level, and mongo level interfaces, along with links to the javadocs for each of these. Additionally, all events that you can receive are listed here as well. See here for more information on building a Custom Element.
Custom Elements #
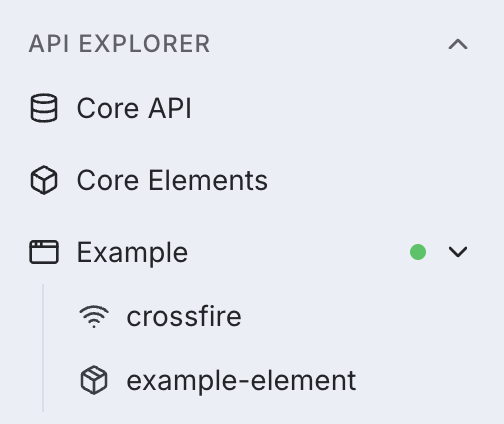

This section lists all of the Custom Elements that you have installed. Theses can be Elements that you developed, or plugins from third party sources. Elements are installed on a per-Application basis. Each Application can have multiple Elements installed.
In the sidebar, the Application names will be listed, with each of the detected Elements under it. If the Elements all loaded properly, a small green dot will be next to it. Otherwise, you may see a yellow or red dot. Clicking on the Element will give you information about that Element, including an API explorer. If the Element failed to load properly, the logs can be found here as well.
Settings #
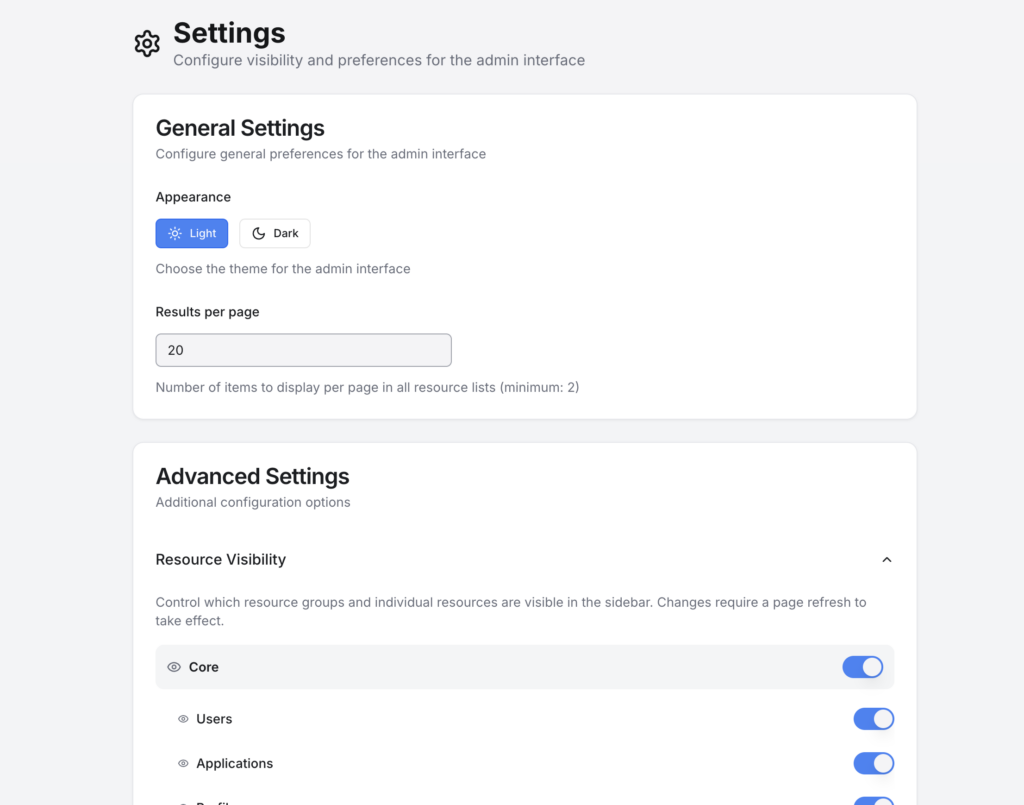
The cog icon in the top right corner of the screen will give you access to the Settings page. From here, you can toggle the visual theme of the CMS, set the results per page for paginated results, and toggle the visibility of various other pages (for instance, if you know that you’ll never user a particular feature and want it out of the way). After saving your settings changes, you may need to refresh the page to apply them.