This page explains how to create, modify, and delete metadata and metadata schemas in the Namazu Elements Management Console.
Overview #
Metadata in Namazu Elements are arbitrary JSON objects that can be used to remotely configure your game client.
They allow you to adjust gameplay parameters, feature toggles, or live event settings without requiring a new game build.
Each metadata entry follows a metadata specification (metadata spec).
A metadata spec defines the structure, type, and default values of fields allowed in a metadata object.
Together, they provide a structured way to manage configuration data for live operations, events, and other dynamic game content.
📝Using Metadata
If you have experience with other backend systems, metadata in Namazu Elements functions similarly to PlayFab Title Data or Remote Config in other platforms.
The key difference is that Namazu supports arbitrary nested JSON structures and validates them against a defined metadata spec, giving developers more control and consistency.
Creating a Metadata Schema #
- Log in to the management console and navigate to
Metadata → Metadata Specs. - Click Create Metadata Spec
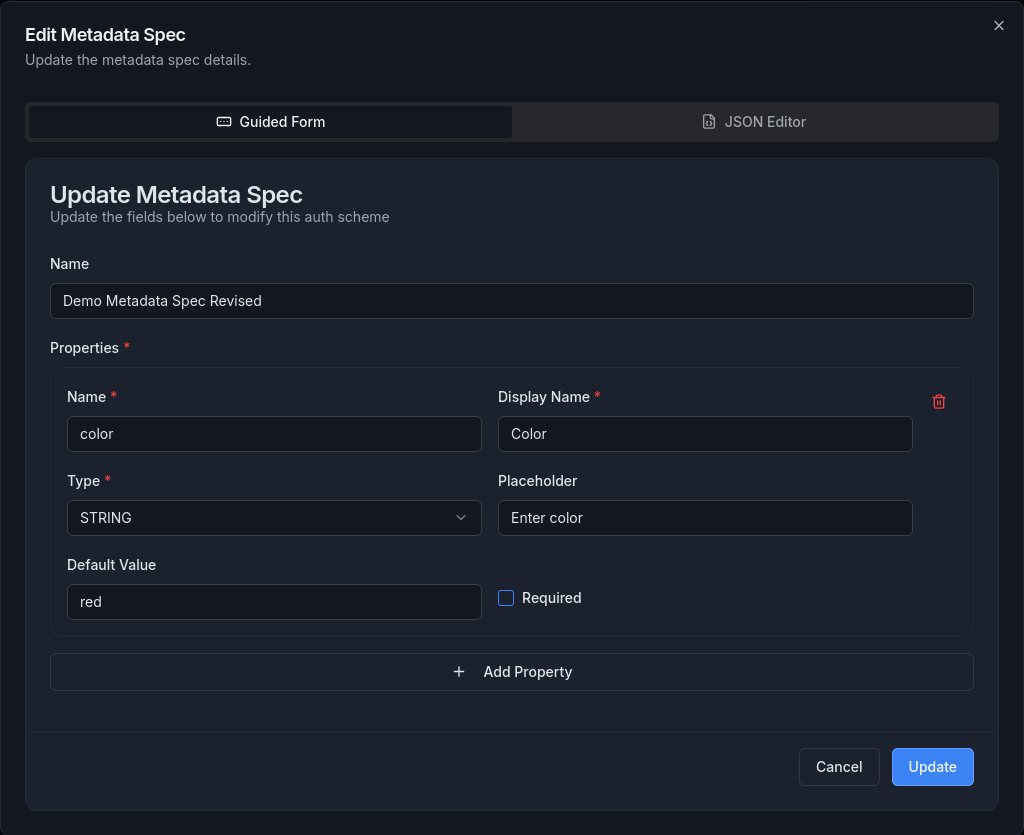
- Enter Properties:
- Name: A unique name for the Metadata Schema
- Access Level: Define which user level is required to read this
- Properties: Define fields that metadata using this schema will include.
- Internal Name: Unique key for the field.
- Display Name: Human-readable label.
- Type: Data type (
STRING,INTEGER,BOOLEAN,OBJECT, etc.). - Default Value: Value to use when none is provided.
- Required: Check if the field must be present in all metadata.
- Click Create to save the schema.

Modifying a Metadata Schema #
- Go to Metadata → Metadata Specs.
- Locate the schema you want to change and click the edit (pencil) icon.
- Update any fields such as changing default values, adding new properties, or renaming display names.
- Click Update to save your changes.
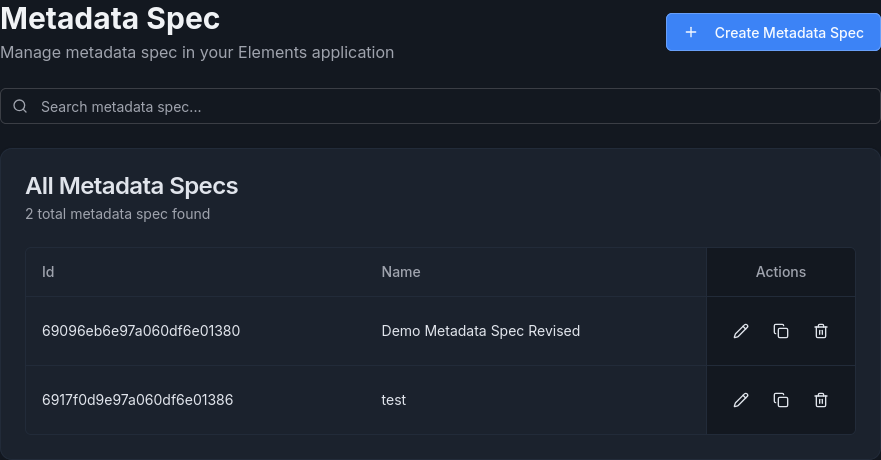
Deleting a Metadata Schema #
- In the Metadata Specs list, click the trash icon next to the schema.
- Confirm deletion.

📝Deletion
Deleting a schema does not automatically remove metadata instances using it, but those instances will lose structural validation.
Creating Metadata #
In order to create a Metadata entry, you must have created a Metadata Spec first.
- Navigate to Metadata → Metadata.
- Click Create Metadata.
- Provide:
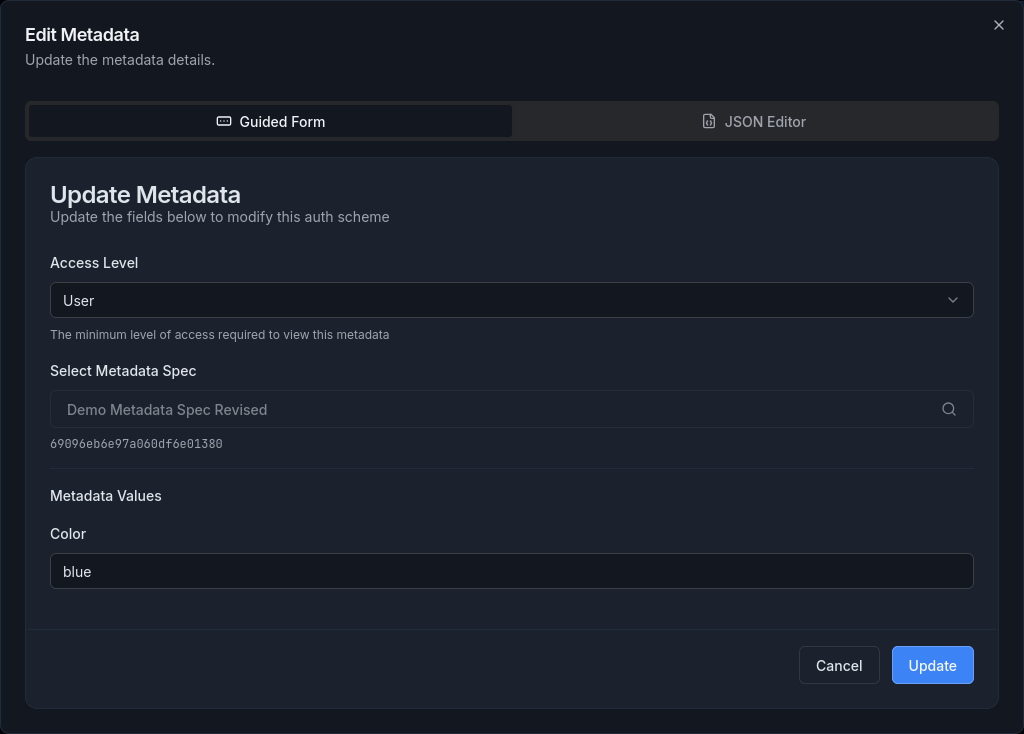
- Name: Unique identifier (no spaces).
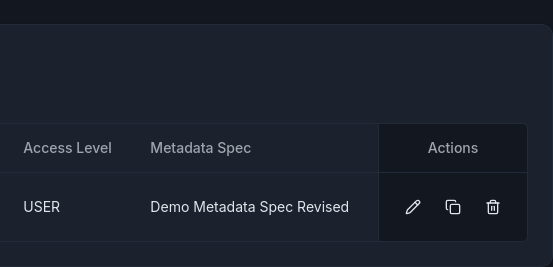
- Access Level: Controls who can view (User, Server, etc.).
- Metadata Spec: Choose which schema defines the data structure.
- Fill in the fields defined in the selected metadata spec.
- Click Create.

Modifying Metadata #
- Open Metadata → Metadata.
- Select an entry and click the edit icon.
- Adjust JSON values in any defined fields.
- Click Update.

Deleting Metadata #
- From the metadata list, click the trash icon next to the desired entry.
- Confirm deletion.

Additional Tips #
- Keep specs generic: Reuse schema definitions where possible to avoid duplication across projects.
- Use defaults wisely: Setting default values ensures clients continue to operate even if updates are delayed or incomplete.
- Validate data before publishing: Always test metadata changes in a staging environment to ensure schema compliance and prevent client crashes.
- Version control your specs: Export or document schema definitions so you can roll back easily.
- Avoid hardcoding: Keep client-side logic dynamic by referencing metadata keys rather than embedding configuration constants.
Summary #
- Metadata are flexible JSON objects used to configure game clients remotely.
- Metadata Specs define the structure and validation rules for those objects.
- The Management Console provides a simple interface for creating, editing, and deleting both metadata and their specs.
- With schema-driven configuration, live updates can be deployed safely and consistently without requiring new builds.